

Welcome to Vision Science Labs
Select an Assessment on the left to get started
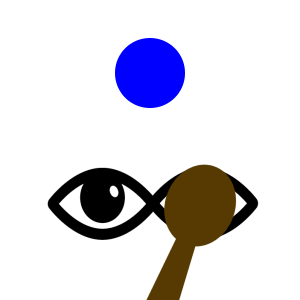
Put on your Vision Science Labs certified 3D Glasses.
Focus on the circle in the center of the screen.
Beginning with your left eye, alternate covering each eye with your hand. Switch your covered eye every second, or as instructed by your health care provider.
If the circle does not appear in the same position between each eye covering, use the arrow keys to move the circles until they appear in the same position.
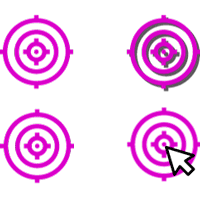
Put on your Vision Science Labs certified 3D Glasses.
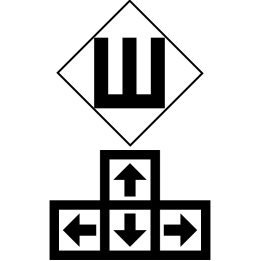
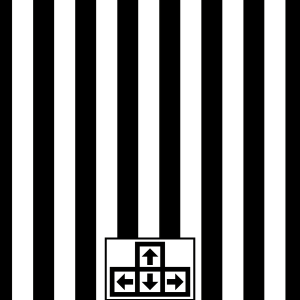
Select the target that pops out the most on the screen.
You can use your mouse, arrow keys or WASD keys to make your selection.
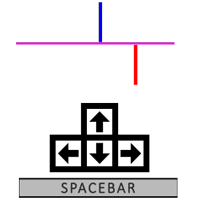
Put on your Vision Science Labs certified 3D Glasses.
Use the left and right arrow keys to move the red line until it lines up with the blue line and push SPACEBAR.
Put on your Vision Science Labs certified 3D Glasses.
Focus on the center of the image.
Press the arrow keys to move the image until you see double, then push SPACEBAR.
Press the opposite direction arrow keys until you see a single image again, then push SPACEBAR.
Settings:
Near- 40cm
Intermediate – The closest distance that will allow your monitor to show 20/20
Far- 300cm
Instructions:
Cover the appropriate eye.
Push the arrow keys to indicate the open direction of the E.
Push SPACEBAR if you no longer clearly see the E.
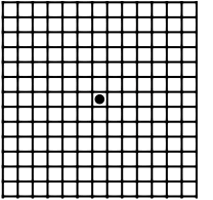
Cover the appropriate eye and maintain your focus on the black dot throughout the exercise.
Move your head closer or farther from the screen until you no longer see the blue dot in your periphery.
Use the mouse to draw any abnormalities in the grid.
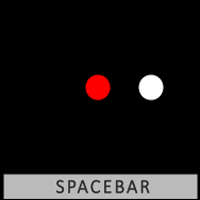
Cover the appropriate eye and maintain your focus on the red dot throughout the exercise.
Move your head closer or farther from the screen until you no longer see the blue dot in your periphery.
Press SPACEBAR every time you see a white dot appear.
Shift your eyes to follow the circle as it appears on the screen.
Use the arrow keys or WASD keys to indicate the direction of the E image.
The test will end after 30 seconds.
Focus on the center of the screen.
Push the arrow keys to change the direction and speed of rotation.
For Vertical OKN Drum, push the up and down arrow keys to change the direction and speed of rotation.
Push the SPACEBAR to end the test
Push the up arrow to decrease the size of the 4 dots.
When you can no longer clearly distinguish the 4 dots, push the SPACEBAR.

Use the arrow keys to indicate the direction that the character is open.
As you continue, the character will increasingly fade in to the background.
Press SPACEBAR when you no longer see the E.